Compilation Marlin MKS GEN L + TMC2208 + BLTouch
Les soft nécessaire :
Arduino : https://www.arduino.cc/en/Main/Software
ou
Visual Studio Code : https://code.visualstudio.com/
La derniere version de Marlin : https://github.com/MarlinFirmware/Marlin
Le matériel :
Kit complet MKS + TMC 2208 + écran
Amazon : https://amzn.to/2X89Kgd
Ali : https://s.click.aliexpress.com/e/_d8n7kZL
BLtouch :
Un BLTouch : https://amzn.to/2l8HCt9
Le câble d’extension 1,5m : https://amzn.to/2jFExAa
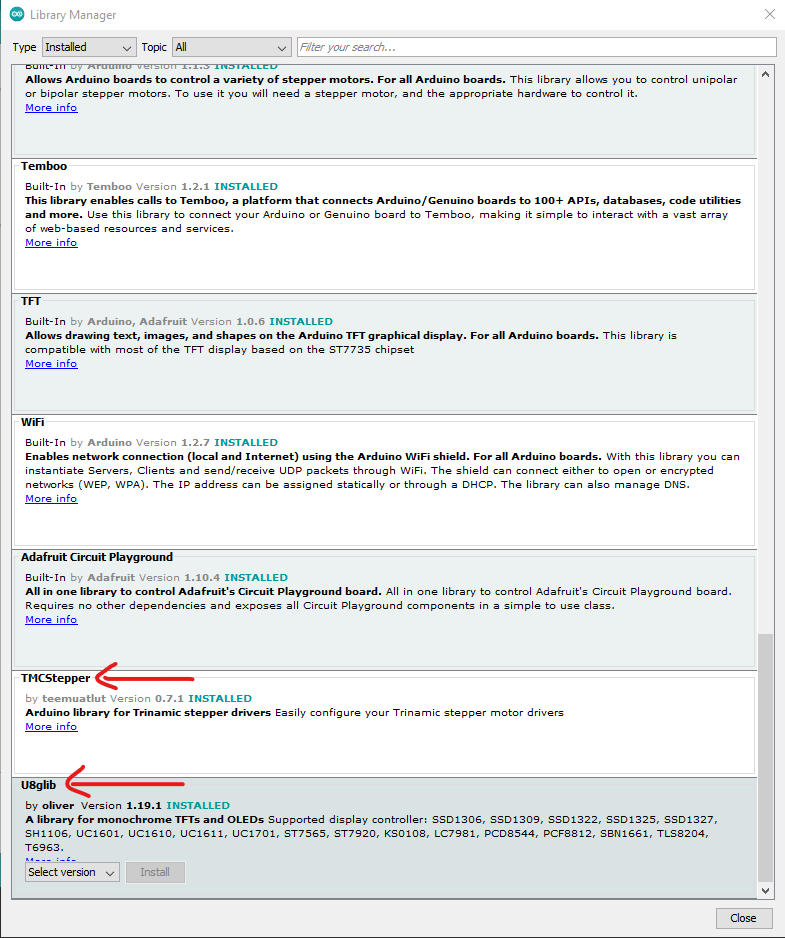
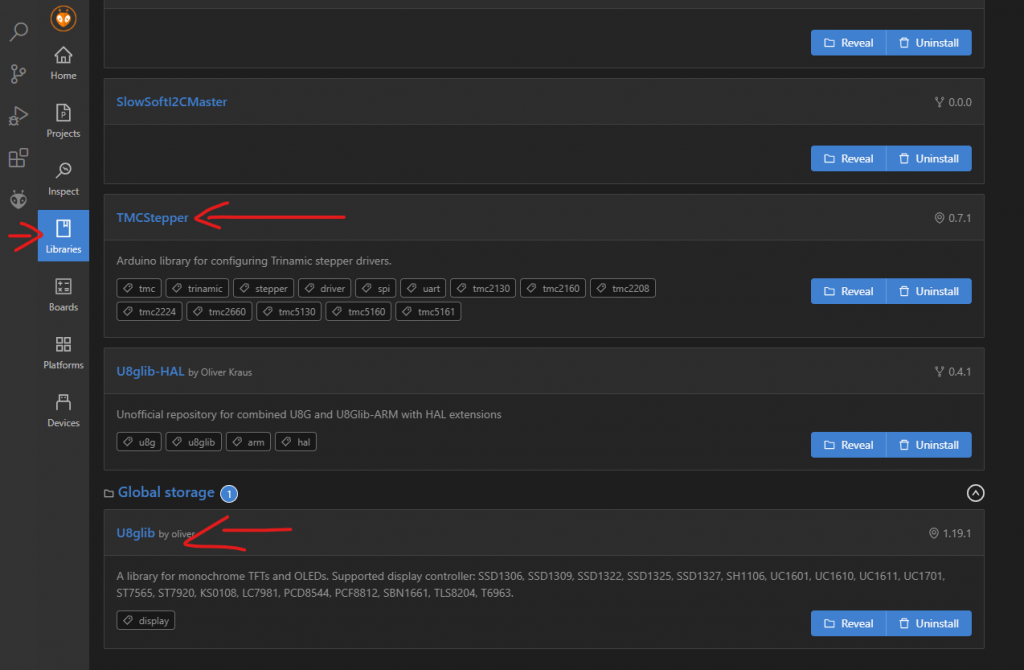
il va falloir inclure dans Arduino ou dans visual studio les bibliothèques : TMCStepper et U8glib
Arduino:
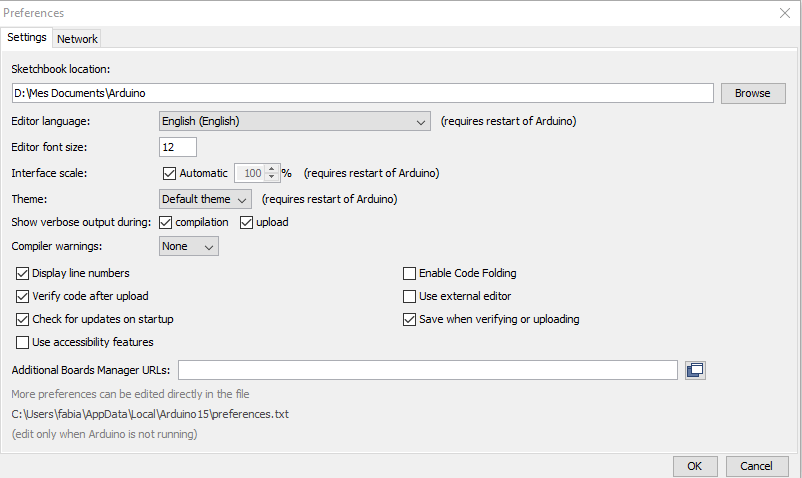
Pour voir les numéros de ligne dans votre interface :
Visual Studio
Les lignes à modifier:
( les numéros peuvent changer légèrement selon la version de Marlin, faites CTRL+F pour chercher par terme)
Lignes 131 : #define MOTHERBOARD BOARD_MKS_GEN_L
Lignes 145 : #define DEFAULT_NOMINAL_FILAMENT_DIA 1.75
Lignes 687 – 689 & 695 : remplacez les driver : TMC2208
#define X_DRIVER_TYPE TMC2208
#define Y_DRIVER_TYPE TMC2208
#define Z_DRIVER_TYPE TMC2208
#define E0_DRIVER_TYPE TMC2208
Lignes 712 à 719
// Mechanical endstop with COM to ground and NC to Signal uses « false » here (most common setup).
#define X_MIN_ENDSTOP_INVERTING true // Set to true to invert the logic of the endstop.
#define Y_MIN_ENDSTOP_INVERTING true // Set to true to invert the logic of the endstop.
#define Z_MIN_ENDSTOP_INVERTING false // Set to true to invert the logic of the endstop.
#define X_MAX_ENDSTOP_INVERTING true // Set to true to invert the logic of the endstop.
#define Y_MAX_ENDSTOP_INVERTING true // Set to true to invert the logic of the endstop.
#define Z_MAX_ENDSTOP_INVERTING true // Set to true to invert the logic of the endstop.
#define Z_MIN_PROBE_ENDSTOP_INVERTING false // Set to true to invert the logic of the probe.
Lignes 926 & 927
//#define PROBE_MANUALLY
//#define MANUAL_PROBE_START_Z 0.0
Lignes 950
#define BLTOUCH
Lignes 1023 (!!!Correspond ici a vos réglage de décalage en rapport avec votre fang)
#define NOZZLE_TO_PROBE_OFFSET { -29, -22.2, 0 }
Lignes 1064 à 1067
#define Z_CLEARANCE_DEPLOY_PROBE 15 // Z Clearance for Deploy/Stow
#define Z_CLEARANCE_BETWEEN_PROBES 10 // Z Clearance between probe points
#define Z_CLEARANCE_MULTI_PROBE 5 // Z Clearance between multiple probes
//#define Z_AFTER_PROBING 5 // Z position after probing is done
#define Z_PROBE_LOW_POINT -2 // Farthest distance below the trigger-point to go before stopping
Lignes 1122 – 1123
#define X_BED_SIZE 235
#define Y_BED_SIZE 235
Ligne 1131
#define Z_MAX_POS 250
Lignes 1283 à 1287
//#define AUTO_BED_LEVELING_3POINT
//#define AUTO_BED_LEVELING_LINEAR
#define AUTO_BED_LEVELING_BILINEAR
//#define AUTO_BED_LEVELING_UBL
//#define MESH_BED_LEVELING
Ligne 1293
//#define RESTORE_LEVELING_AFTER_G28 false
Lignes 1331 à 1333
// Set the number of grid points per dimension.
#define GRID_MAX_POINTS_X 5 // valeur Min 5 pour éviter des erreurs
#define GRID_MAX_POINTS_Y GRID_MAX_POINTS_X
Lignes 1437
#define Z_SAFE_HOMING
Ligne 1652
#define LCD_LANGUAGE fr
La plaque de fixation pour votre MKS : https://www.thingiverse.com/thing:4631709
Le support écran : https://www.thingiverse.com/search?q=mks+tft+3.2&type=things&sort=relevant
Niveau branchement , voici un schéma qui reprends les différentes connectique de la carte.
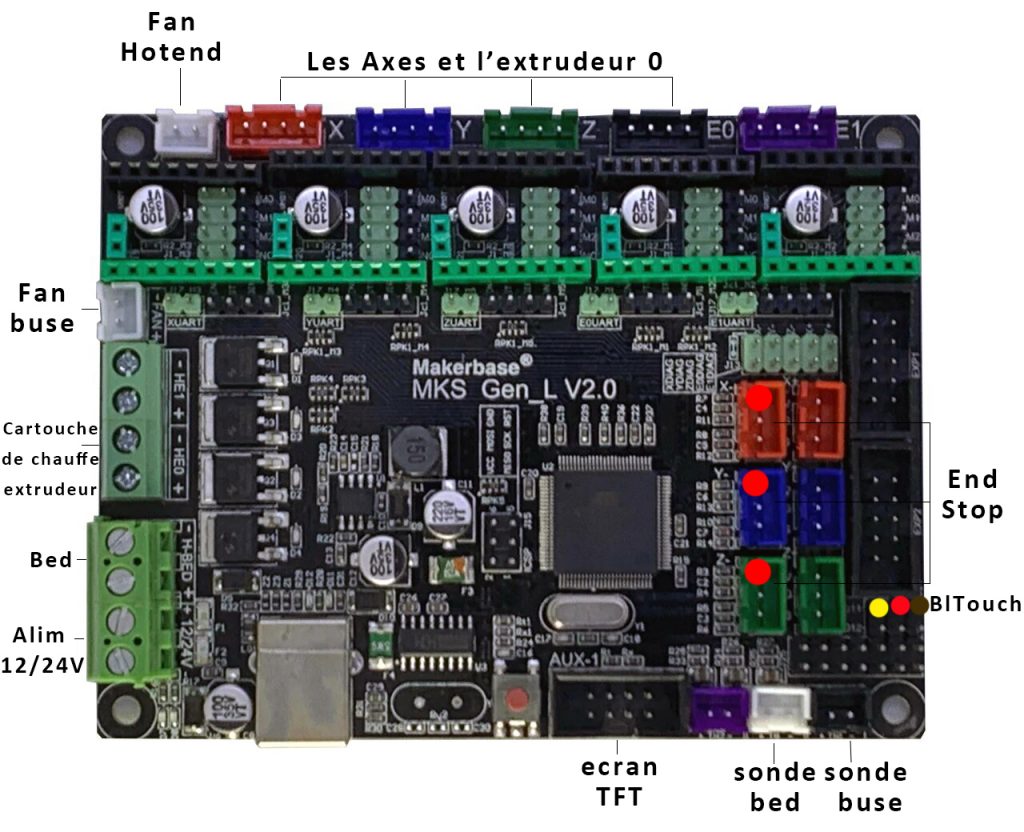
Si comme moi vous utilisez Octoprint pour contrôler votre machine, sachez que le port USB alimente la carte en permanence, Si vous désirez que la carte se coupe totalement , vous pouvez tout simplement couper le câble rouge de votre allonge USB qui correspond au 5V de celui-ci.

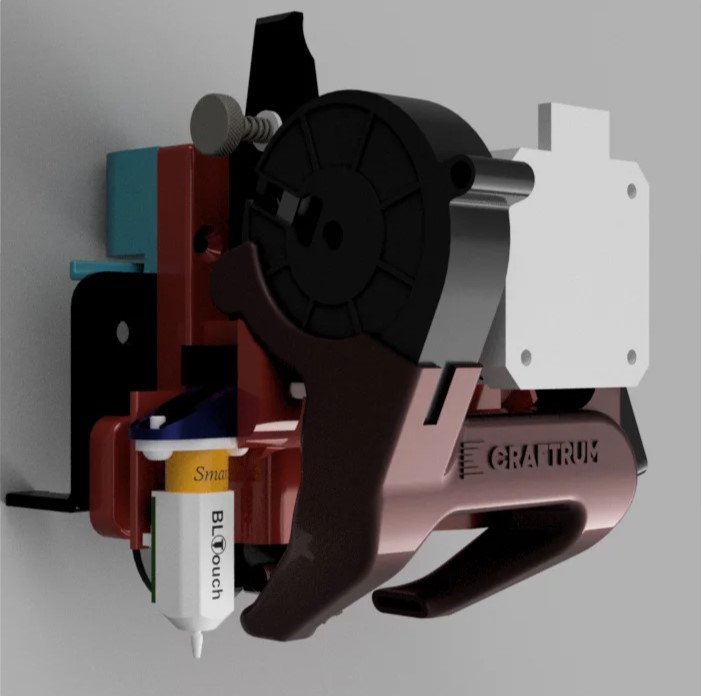
Pour le direct drive
https://www.thingiverse.com/thing:4604152
Ventilateur radial 5015 :https://s.click.aliexpress.com/e/_dZANMh5
Ventilateur 40×20 :https://s.click.aliexpress.com/e/_dUfWlvv
tete E3DV6 :https://s.click.aliexpress.com/e/_eLwbHh
BMG :https://s.click.aliexpress.com/e/_eL7hex

